Showing posts with label diy. Show all posts

Tuesday, February 10, 2015

DIY Fabric Coasters


We had to start crate training our dog, Grizzly, because when we moved into our house he began chewing random things up while we were gone. We let this slide until he ate a $300 automatic car key! He actually grew to love it insanely fast and sleeps in there even when we're home. The other day, though, I noticed two of our coasters were missing. When I got home from work that day, I found them. Chewed up, swallowed, and pooped out. Yeah, pretty gross. That dog is pretty smart. He hid them in his crate so he could go to town on them when we weren't around! This was two things: Disgusting, because I had to clean it up. But also a good thing because I had been wanting to make some new fabric coasters and now I was forced into it.

So here's a simple DIY project made from my misfortune! All you need is a little bit of fabric and basic sewing skills. 


You will need:
8 - 4.5 inch squares for your coaster design
4 - 4.5 inch squares of batting


First, place two pieces of your fabric right sides together and place the batting on top.

Next, start near the edge of one side and sew all the way around, leaving a 1.5 inch opening on one side. Cut off the corners to make poking the edges out easier.


Now, turn your fabric right side out! It might take a little bit of work. There will be the open gap you didn't sew in step two.

Lastly, fold the fabric inward and sew a top stitch around the entire square, making sure you sew the gap together. Repeat for the rest of the coasters.


So easy! It took me about 30 minutes, and that included a couple breaks of me having to throw toys around Levi to keep him entertained! If you make the coasters, let me know how it went. I'd love to see pictures!


Monday, July 14, 2014

DIY: Vintage Step Stool Chair


Almost a year ago, I found this chair on the side of the road. I swiftly turned around and stuffed the dirty thing in my trunk. I set it in the garage for a few months and kept debating whether or not it was worth fixing up because it was so dirty and rusted. While working on another project, we used a palm sander to sand the top of the chair and it came out so nicely that I knew we had to keep it! So I went and got paint and a butt load of painters tape and this beauty was born!


The first two pictures are from before we did anything but wipe it down a little bit. Then we used a wire brush attachment on the end of a power drill to get all the rust off the chair. This took some time, because there was a lot of rust! Then we used some enamel primer to paint a few coats on top of the seat because it was the most damaged part of the chair.


I spent probably an hour putting tape on this thing, it was so aggravating! But I wanted to make this thing beautiful, so I made sure to do a good job taping it up. Afterward, I took it outside and put two coats of red glossy spray paint, letting it dry between coats. I think it looks perfect in Levi's room!


Friday, March 7, 2014

DIY: Quilt Rack Makeover


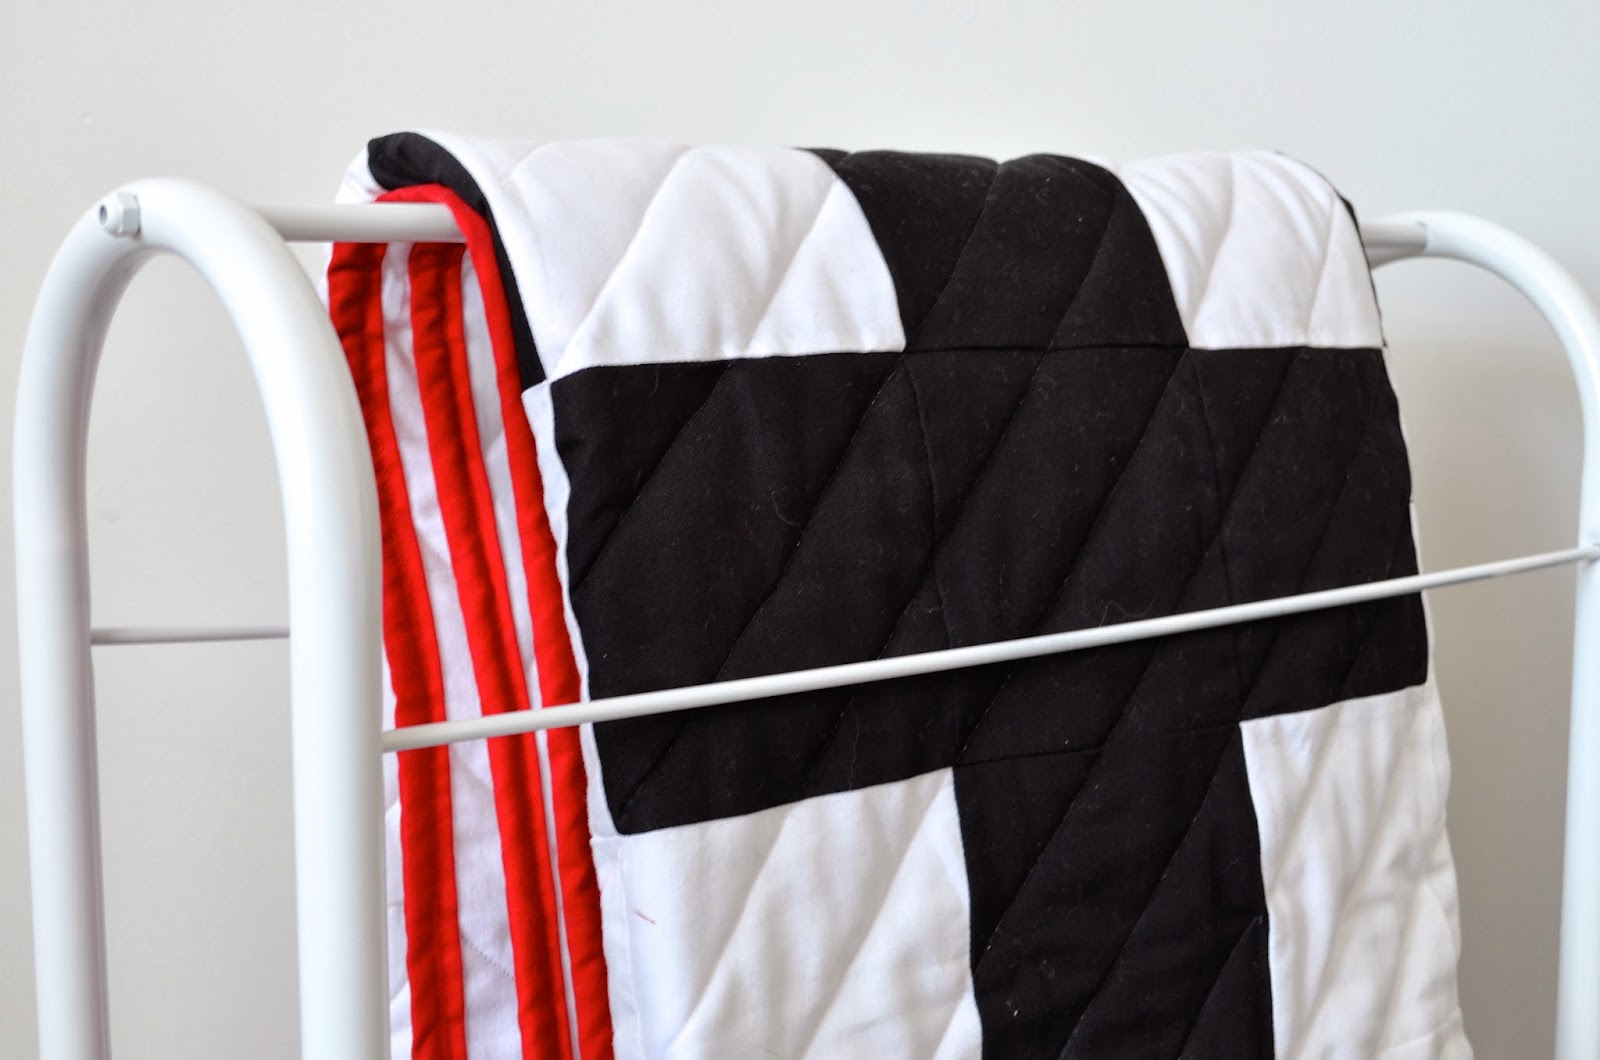
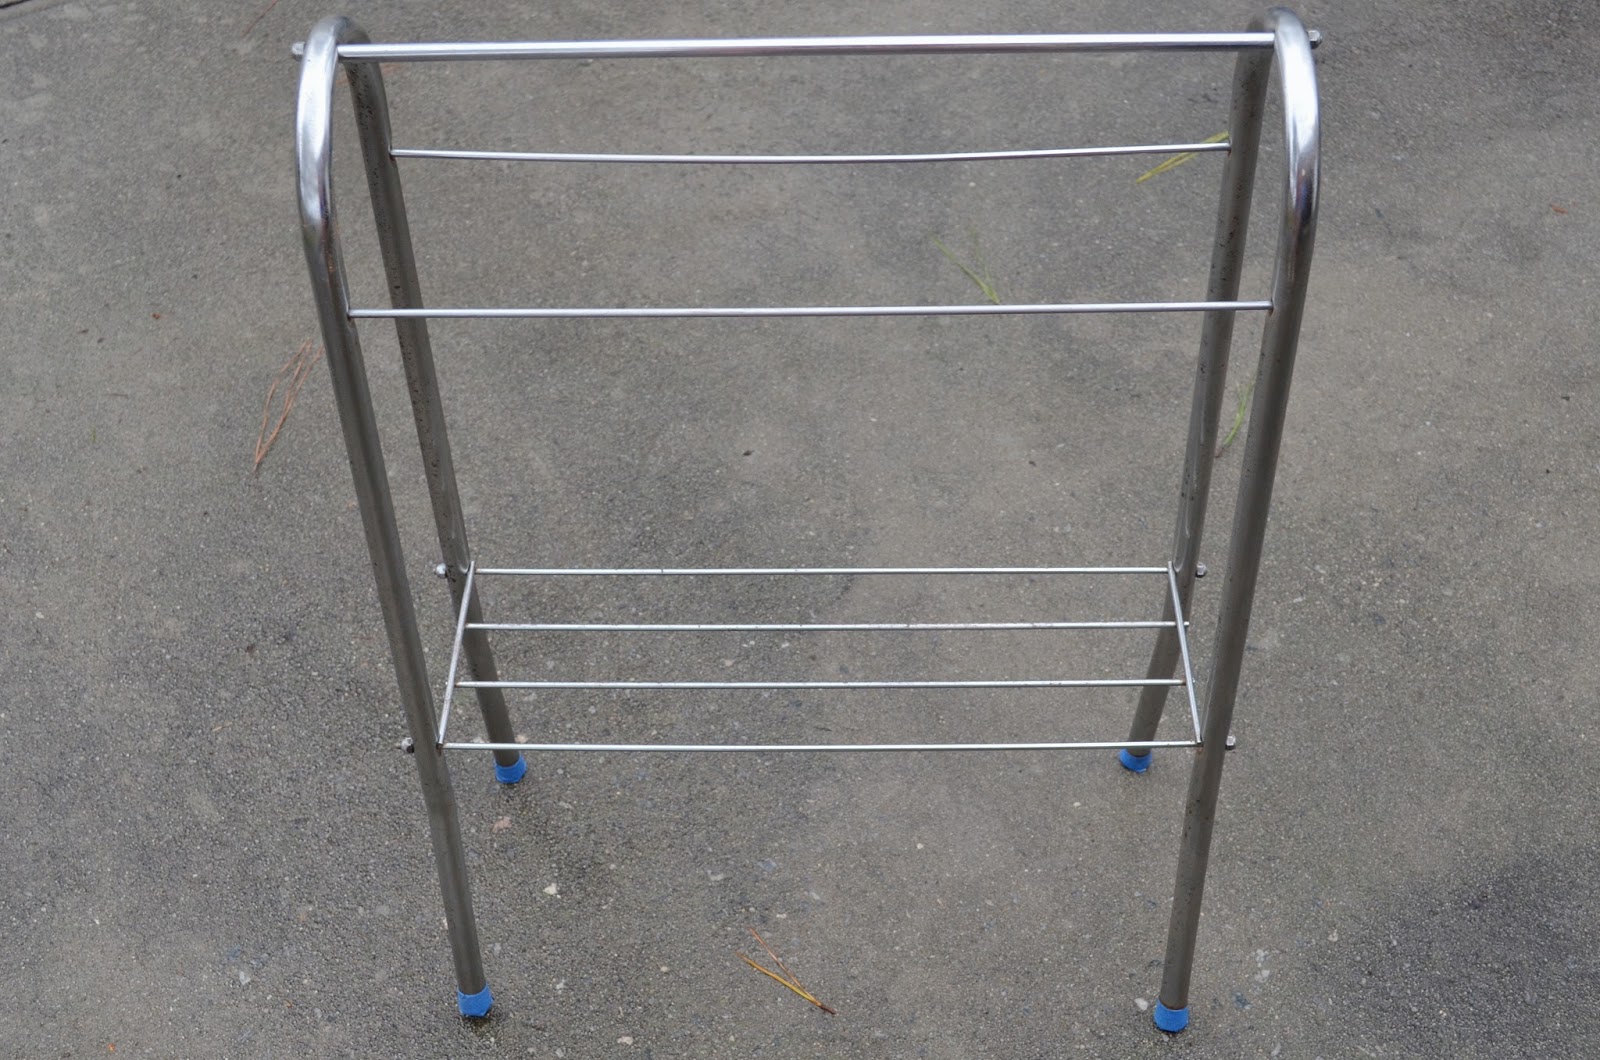
Months before I even found out I was pregnant, I found this dingy little quilt rack at a thrift store for five dollars. It was rusted and beat up, but I just knew it had potential. When I found out I was pregnant and was reminded of my purchase, I knew it was time for the makeover! This project cost me a total of $9.

 before

First, I easily took it apart and sanded the rust off.


Then I put it back together, and made sure to tape off the feet with painters tape.


Then I used glossy white enamel spray paint, which was four dollars at Lowe's. I left it in the garage to dry overnight. Actually, it was left to dry for about two weeks until I finally took the tape off and got the final result pictures! Haha. 


I love how it turned out! My mom also made the quilt that is sitting on the rack for Levi's nursery! It's super awesome and I'm in love with the bold red border on it. I'll get a better picture of the quilt and show it off real soon! ;)

Monday, February 24, 2014

DIY: Painted Baby Onesies

diy onesies, blue and green onesies, orange and yellow onesies, triangle print onesies diy, diy polka dot onesies, diy painted onesies, geometric onesies, diy geometric onesies, diy stamped onesies, diy baby tutorial, diy baby crafts, painted baby onesies, diy baby tutorial

I bought a 4-pack of onesies a few weeks ago and recently got a chance to put some color on them and thought I would share! This was such a simple project to complete.

You will need:
Onesies
Paint
Cardboard or thick material

Optional:
Stencils
Circular sponges

diy onesies, blue and green onesies, orange and yellow onesies, triangle print onesies diy, diy polka dot onesies, diy painted onesies, geometric onesies, diy geometric onesies, diy stamped onesies, diy baby tutorial, diy baby crafts, painted baby onesies, diy baby tutorial

I used a tie stencil on one of them and a circular sponge for one. For the triangle print, I freehanded the triangles with an angled paintbrush.

diy onesies, blue and green onesies, orange and yellow onesies, triangle print onesies diy, diy polka dot onesies, diy painted onesies, geometric onesies, diy geometric onesies, diy stamped onesies, diy baby tutorial, diy baby crafts, painted baby onesies, diy baby tutorial

diy onesies, blue and green onesies, orange and yellow onesies, triangle print onesies diy, diy polka dot onesies, diy painted onesies, geometric onesies, diy geometric onesies, diy stamped onesies, diy baby tutorial, diy baby crafts, painted baby onesies, diy baby tutorial

So easy! These took just a few minutes to complete and I think they're super adorable.

Friday, February 14, 2014

DIY: Valentine's Day Gift

diy valentine's day, valentine's day diy, diy valentine's day gift, diy valentine's day gift for guys, valentine's day gift for guys, homemade valentine's day gift, love you to the moon and back, love you to the moon and back card, chevron coupon booklet

I always opt for (at least partially) handmade gifts. One, because they're cheaper. Two, because it's so much more fun that way! For Valentine's Day, I made Corey a little gift package with a few surprises in it. I started by taking an envelope and stamped some circles with acrylic paint. Then, I printed off this free card and added some washi tape to the edges. I decided to make a coupon booklet, like the ones you make when you're a little kid. I'm still totally into the idea of coupon books, haha! Some paint samples that were left over from another project got cut into strips and folded for confetti.

diy valentine's day, valentine's day diy, diy valentine's day gift, diy valentine's day gift for guys, valentine's day gift for guys, homemade valentine's day gift, love you to the moon and back, love you to the moon and back card, chevron coupon booklet

diy valentine's day, valentine's day diy, diy valentine's day gift, diy valentine's day gift for guys, valentine's day gift for guys, homemade valentine's day gift, love you to the moon and back, love you to the moon and back card, chevron coupon booklet


diy valentine's day, valentine's day diy, diy valentine's day gift, diy valentine's day gift for guys, valentine's day gift for guys, homemade valentine's day gift, love you to the moon and back, love you to the moon and back card, chevron coupon booklet

diy valentine's day, valentine's day diy, diy valentine's day gift, diy valentine's day gift for guys, valentine's day gift for guys, homemade valentine's day gift, love you to the moon and back, love you to the moon and back card, chevron coupon booklet

What are you doing for Valentine's Day? I honestly have no idea what we're going to do! I'm not huge on these kinda holidays, but I do have fun making cute little things like this. As I've gotten older, I take any reason to celebrate because why not? It feels nice to get fancy and I'd do it way more often if I could! Hope y'all have a lovely holiday! <3

Friday, February 7, 2014

DIY: Heart String Garland w/ Paint Samples

Since Valentine's Day is only a week away, I thought I'd share a cute and simple DIY tutorial on making a cheap heart garland! The cost to me was absolutely free, because I already had the paint samples and scrapbook paper. :) I'm pissed though, 'cause I took these pictures of the setup afterward and really enjoyed them, but Blogger is doing that stupid thing where the pictures show up really low-res and look awful! So we'll just have to deal with that... 

diy garland, diy string garland, diy heart garland, diy heart string garland, valentine's day garland, diy valentine's day project, diy valentine's day garland, valentine's day diy tutorial, heart garland tutorial

diy garland, diy string garland, diy heart garland, diy heart string garland, valentine's day garland, diy valentine's day project, diy valentine's day garland, valentine's day diy tutorial, heart garland tutorial

1// Gather your supplies. I used some leftover paint samples and scrapbook paper.

2// Make a stencil and trace it onto your paper.

3// Cut out your shapes and line them up to sew.

4// Sew them up!

diy garland, diy string garland, diy heart garland, diy heart string garland, valentine's day garland, diy valentine's day project, diy valentine's day garland, valentine's day diy tutorial, heart garland tutorial

diy garland, diy string garland, diy heart garland, diy heart string garland, valentine's day garland, diy valentine's day project, diy valentine's day garland, valentine's day diy tutorial, heart garland tutorial

Such a simple project that took about 20 minutes, and it was adorable! I plan on making a bigger one for when we have a housewarming party sometime in the near future! :)

Friday, January 24, 2014

DIY: Rockabilly Wire Headband

** I seem to be getting a ton of page views from Pinterest for this DIY tutorial. I just wanted to put it out there that I also post other DIY tutorials on my blog, along with my adventures in thrifting, crafting, and style! If you're interested in seeing this, just follow my blog by clicking "Join this site" on the right hand side of the page or clicking the "f" button under my picture to see my posts on your Facebook feed! :) **

diy rockabilly wire headband, diy wire headband, diy headband tutorial, no sew headband tutorial, rockabilly tutorial, diy rockabilly, polka dot headband, handmade wire headband

You will need:
measuring tape
1/4 yard of fabric (cotton works best)
scissors and/or rotary cutter
craft wire
needle and thread (sewing machine optional!)
______________

1// Measure around your head. My head measured 21", and I added an extra 8" for the ends of the headband.

2// Cut your fabric. My length was 29" (see above) and I cut mine to be 6" wide.

diy rockabilly wire headband, diy wire headband, diy headband tutorial, no sew headband tutorial, rockabilly tutorial, diy rockabilly, polka dot headband, handmade wire headband

3// Fold your fabric in half, hot dog style, to be 3" wide. The first picture shows the bright blue side, but make sure that the wrong sides are facing each other as they are in picture two.

4// Cut off the corners on each end. I rounded mine a bit.

5// Now start at one end, and sew the headband up. Make sure to leave about 1.5" opening to pull your fabric though! You can see in the third picture that there's a little gap left open.

6// Now gather up the fabric and turn right side out. I did it kinda like you would a long, skinny sock!

diy rockabilly wire headband, diy wire headband, diy headband tutorial, no sew headband tutorial, rockabilly tutorial, diy rockabilly, polka dot headband, handmade wire headband

7// Cut your craft wire to be 1.5" longer than your fabric. Mine was 30.5" long. Bend a loop on each end.

8// Now stick the wire all the way through the fabric. I used a pin to keep the loop in place. Do this!

9// Sew the opening closed. I was lazy and didn't use matching thread. :)

10// From step 8, take a needle and thread and sew a few stitches to keep your wire loop in its place so that it doesn't come loose after multiple wears. This trick really helps!

diy rockabilly wire headband, diy wire headband, diy headband tutorial, no sew headband tutorial, rockabilly tutorial, diy rockabilly, polka dot headband, handmade wire headband

This was so easy to make; it literally took me 10 minutes! I will definitely be making more!

Friday, November 15, 2013

Baby Shower on a Budget

When I found out one of my best friends was pregnant with her second child, I knew I had to throw her a baby shower! This was months ago, before I even knew that I was pregnant, so I've really loved getting to visualize the shower and making it come to life. Since I was throwing this shower on a budget, I DIYed a lot of the stuff, which is all explained below!


Of course, I got a lot of inspiration from Pinterest. Once I made my food list, I decided on decorations and invitations. I used free printables from this website, which I printed on silver card stock paper left over from doing my wedding invitations and cut them to fit the envelope. I covered the kitchen table with a white tablecloth, then used about 25 paper doilies and randomly placed them around the table. Then, I used pink and grey felt (about 3 squares of each) and cut into triangles then sewed together for the bunting.


The part I was most excited about was the pink lemonade served in lace decorated mason jars! I save leftover jars (it's actually sort of a problem) so I just tied some scrap lace onto the jars with embroidery thread. The pink lemonade was made from the frozen tubes! Super simple.


For the fruit kebabs, we diced up different fruits and put them on to mini bamboo sticks ($3). My mom made a big batch of whipped icing, and the cupcakes were a strawberry cake mix.


I'll be posting a recipe for the pink popcorn next week! It's super simple to make. For serving, I cut standard scrapbook paper into quarters (6"x6"), rolled into cones, and taped with wash tape that I already had. Craft stores put scrapbook paper on sale a lot (Michael's sale is usually 4 for $1) so this is another really simple and cheap project! For the toothpick flags, I bought two different pieces of scrapbook paper in the same color palette, and cut the edges to a fringe about 1.5 inches long. After cutting the fringe off, you'll have a bunch of little strips. Fold those in half and cut the edges!


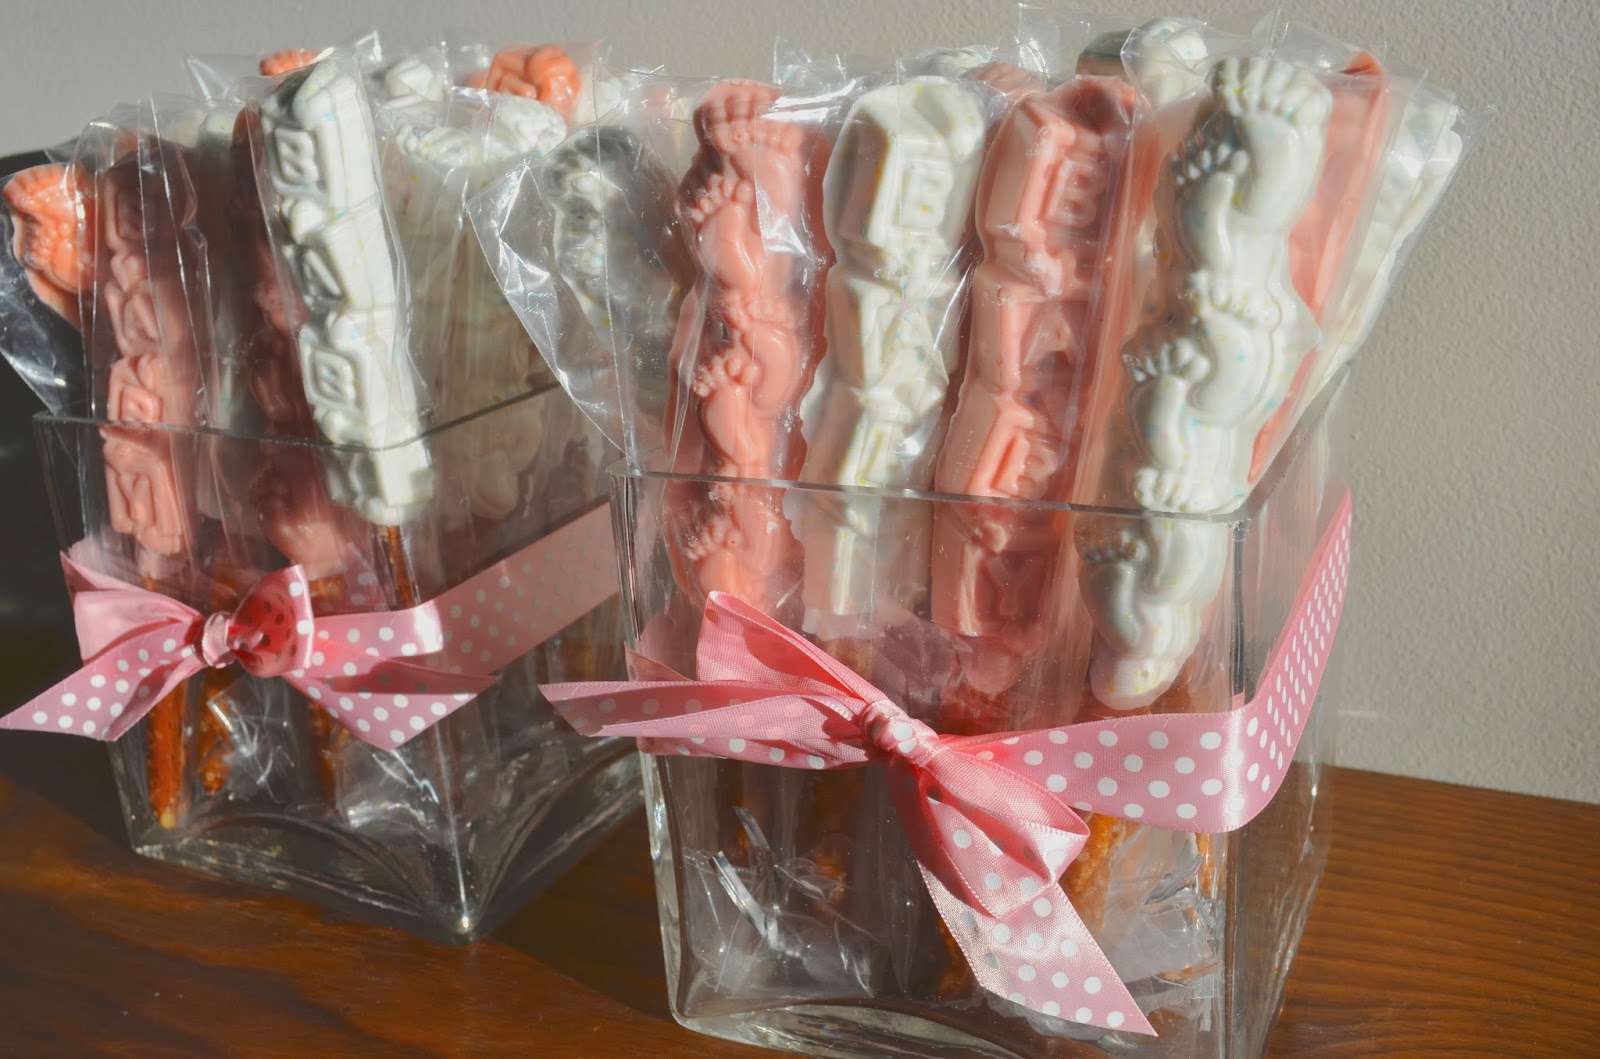
Lastly, we made pretzel rods as favors! This task wasn't as cheap or easy, but it was definitely one of my favorite things! The mold is from Michael's for $2.99, and for 40 pretzels, we used about 4 bags total of the melting candy. Everyone loved the pretzel favors, and I was so pleased that everyone noticed my little touches throughout the party! Another one of my friends just found out she's having a girl, so I'm glad we have some decorations left over! 

Friday, September 27, 2013

DIY: Embroidery Thread Organizer

Today I have a fun little DIY for you guys! I first saw this post by Gloria, and knew I had to do it for myself! I have so much embroidery thread laying around and this was such a cute way to organize it all!

cut out a rectangle on card stock // cut cute little ears
make 1 slit at top left and 2 on the bottom // decorate!


Let me know if you plan on trying it out or send me a link if you do! I tried to think of some other animals to do but I had a brain fart. I still think they're super cute. :)

Friday, July 19, 2013

DIY: Textured Vases

Today I'm sharing a really simple tutorial on making over plain vases! These would look great in any color, but I love the look of white milk glass so that's what I was going for here. I went to the thrift store and bought four vases for about $2. This DIY costs less than $10!

You will need:
Vases
Puffy paint
Matte spray paint

You can google search vase designs, but I just don't have a very steady hand so I went with simple patterns! Use your paint bottle and carefully apply your design.


Wait for it to dry completely, then take them outside and spray them.


We had an unusually sunny day, so I let them sit outside for a few hours. And you're done! I planned on this being a two step process, adding in some real branches with leaves made out of various colored paint chips but I've been a real slacker lately. Maybe that will be my next tutorial!


I've had a hard time blogging this week, because I really haven't been in the best state of mind. Things are getting a lot harder than I had imagined, and there's really not much I could have done to prepare for it. I still haven't fully started my job and that's another thing bothering me, but I'm trying to stay positive and find things to look forward to... Such as Riot Fest in Chicago! I'd like to get some people together and make a trip out of it, but we'll see how that goes. If you're interested in being picked up, send me an email!

I hope you all have a great weekend!

LinkWithin

.